Pages

Monday, August 10, 2015

Why Doesn't My House Look Like the Ones In Magazines?

Many times when I'm cleaning, I lament that our house doesn't look like one of the picture perfect ones in the magazine, or that I see on Pinterest.  Yes, we are surrounded by things we love.  Probably a few more things that I love than Andrew loves; I think some of it is just clutter to him.  I walk into some houses and wish I had an eye like they do to put things together; you know who you are people!  I look for pictures on Pinterest and try to mimic what I see.  However, it always ends up looking like a semi hot mess, I think.

Recently, I have taken to figuring out our master bedroom.  I feel like the bathroom looks all lovely a new, and the bedroom just doesn't match the same vibe.  We recently received my grandparents set of bedroom furniture.  Classic mid century modern furniture.  Solid walnut, and in great shape.  It has really motivated me to try and think about actually getting some cohesiveness in the bedroom.  When we moved into this house, we bought our lovely king bed.  I can't lie, going from a full sized bed to a king has been awesome!

   Our Bed 

And then we got our bedspread, which we purchased at Target.

For over a year, we kept the same curtains that were hanging in our bedroom when we moved in.  The trim on our bedspread is grey, the curtains were brown and I didn't really care.  

A couple of months after we moved in, we decided we needed some artwork in our bedroom, so we purchased a poster at Michaels and bought a frame.


For the longest time, this was the only artwork in our room.  Then, I completed my "always kiss me goodnight" sign this last winter and hung that up.  


Notice, the accent wall in our bedroom is dark brown.  Again, doesn't go with our bedspread, but I have let that go.  By "let it go" I mean I have cans of paint to re paint sitting in the guest bedroom.  The accent wall will be a darker gray and the other walls a much lighter gray.  Someone, at some point before we bought the house, did a terrible job matching paint colors.  We have several spots that were patched and painted over with differing shades of ivory paint.  

Around the same time I hung this sign, I decided to also swap out the curtains.  I'm still not 100% sold on what I ended up with.  The wall with the window in our bedroom is part of the vaulted ceiling, so it makes it hard to hang curtains.  I was going for a "draw the eye up" type of look, but feel like that failed miserably.  The windows have so much potential, but they are failing miserably at the moment.


Earlier this year, when Andrew was out of the state for work, I decided to work on another Pinterest project for the bedroom.  The lyrics to our first dance song on canvas.  I couldn't figure out how to print them on nicely and I wasn't about to stencil them all on.  So, I wrote them on by hand with the neatest handwriting I could.  It ended up a lot smaller than I would have liked.  The initial idea was to hang this next to a picture from our first dance, but I haven't gotten around to that yet...  


When the At Home store opened here in town, I was able to twist Andrew's arm into going with me one day to look at artwork.  You have to understand, shopping for artwork for us is painful.  I like modern art and he likes more traditional art.  I really makes it difficult.  Typically, if we find something we agree on, we buy it.  That day, we purchased a piece for our living room, which still isn't hanging up.  We also were able to find an old map of Boston, which was printed on burlap.  Boston was where we went on our honeymoon, so it had meaning for us.  Needless to say neither the Boston map nor the lyrics are up on our wall yet.

As you can tell, there is quite the mish mash of stuff here.  I know it all goes together some how, I just haven't figured out how.  Rather than trying to figure it all out, I find myself just looking at pictures on Pinterest and dreaming our bedroom looked as put together. Here are a few of my favorites.

 source

 source


source

 source 

source

source


Monday, July 27, 2015

A Few Small Projects

We haven't been up to anything quite as exciting as the bathroom project lately, but we have been getting some things accomplished.

I got the garage painted a few weeks back. It took a couple of days, and thankfully it wasn't as hot as it has been the last few weeks.  We decided to go with a dark gray color to hopefully hide some of the dirt.

The garage before; all cleaned out and all our junk moved to the middle. 

  Painted and things being moved back to their spot!  

Andrew took my desk that I replaced from the basement, so hopefully this will keep his stuff a little more contained and organized in the garage... 

After the garage was painted, we had to put it back together to get ready for a garage sale.  This past weekend, we had a very successful two day garage sale.  Several of our neighbors turned out for the sale, so it was nice to finally meet a few of them after living here for two years!  We actually do have a very friendly neighborhood!  

On Saturday, the final bulb in our kitchen light went out.  The light has been cracked since we moved in, and we have talked about replacing it multiple times.  So, we went out and bought a new light to put in the kitchen.  It provides a little more light in the kitchen and updates the look of the room.  

 I know the before photo is hard to see, but it is a standard white plastic light with fluorescent bulbs. 

Proof that we have been getting a few things accomplished since finishing the bathroom!

Thursday, June 25, 2015

Bathroom Reveal Part 2

So, finally the post has come.  Time to show you all the final photos of the bathroom!  Once all the shower tile was up and the floor tile was put down, it was time to put the bathroom back together.

Shower door in

Final Reveal! 


Before
<--------------


After
-------------->


Details of the Renovation:
  1. Shower Tile - The Tile Shop/Meram Blanc Polished 12x18" tile
  2. Shower Glass Tile - The Tile Shop/Woodlawn Stria 12x12" tile
  3. Floor Tile - The Tile Shop/ Yale Mica  12x24" tile
  4. Wall Tile - The Tile Shop/ Yale Cenzia 6x24" tile
  5. Toilet - Lowes/ American Standard Champion 4
  6. Vanity - Menards/ Pace Charleston Series 36" vanity
  7. Mirror - pulled from our half bathroom on the mail floor 
  8. Over the toilet cabinet - Lowes/Style Selections
  9. Picture - Lowes
  10. Shower Fixtures - Delta fixtures purchased from Amazon: Shower Head, Diverter, Valve
  11.  Sink Faucet - Menards/Pfister Solita faucet
  12. Counter - Home Depot/Home Decorators Collection Carrara
  13. Light -Lowes/Portfolio
  14. Towel Rack - Amazon
  15. Towels - HomeGoods
  16. Shower Base - Home Depot
  17. Shower Door - Menards/Maax Halo 60 inch shower door  
  18. Shower Shelf - Lowes/Delta Providence
This list doesn't include the extra items that we purchased as part of the renovation.  There was the cement board for the shower walls and the floor, waterproofing for the shower, caulking, grout, thinset, tile saw, paint, etc. 

We learned a few money saving tips along the way.  Lowes credit card holders save 5% off purchases all the time.  Occasionally, they will also mail out coupons for $25 off a purchase of $250 or more.  Menards runs their 11% off rebate offer about once per month.  If you purchase something from Menards on a Saturday and see the next day they are running the 11% off sale, ask about getting the rebate offer.  This is how we ended up getting 11% off of our garage door.  Watch sales; they generally rotate and if you miss a sale on an item, it will probably go on sale again in a couple of weeks.  Plan ahead and shop online.  We were able to purchase our fixtures from Amazon, which saved us a ton of money.    

I know by doing the project ourselves, our timeline for completing the project was expanded.  However, the money we saved in the end by doing it ourselves, with a little help from some family and friends, was worth it.  Luckily, we had a second full bathroom we were able to use while ours was under construction.  It is nice to have a functioning master bathroom again and not worry about water pouring through our kitchen ceiling from the shower above.  We have learned a lot during this renovation and are already planning the renovation for the guest bathroom.  We have a few years to plan that one out though! 

Monday, June 22, 2015

Finally.... The Bathroom Is Complete!

Three months and a few thousand dollars later, the bathroom makeover is complete!  We have been able to use the bathroom for about a week now, and it has been amazing.  We put some of the final finishing touches on the bathroom today.

Before I show you the after, I'll go through the bathroom evolution.  We started with tearing everything out down to the studs

Original 1980's oak bathroom 
 My makeover on a budget from last fall 


We had to take everything out to get the stall shower out. 

Vanity gone 
 Hunter green tile and yellow linoleum out

Down to the studs with new plumbing in 

Time for some reconstruction 

Shower base down 
Cement board going up
  Cement board all done

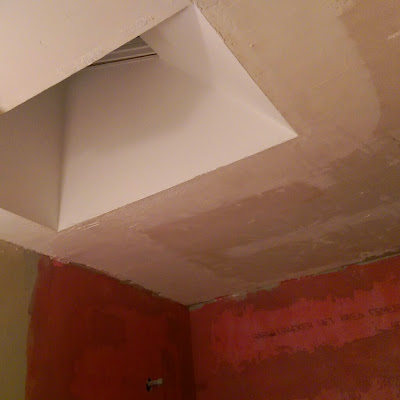
 Waterproofer up in the shower and popcorn texture down off the ceiling.  

Retexturing the ceiling 
 Primer on the walls
Paint up on the walls 

Time for the tile to go up!


Time for floor tile ...
I'm pretty proud that I put these floor tiles down! 

Done 

Now for the grout!

Grouting the glass tile was very time consuming.

Black grout on the floor


Stay tuned for the final touches....... 


Sunday, June 21, 2015

Office Update

A while ago, I posted about redoing my office.  Spending full days in my basement office, I needed something a little more upbeat.  I loved the blue I had in there before, but it was time for something brighter.  Since the stormy blue color that was down there before was a lot darker than the pink I was planning on painting, I knew I needed to put up a coat of primer first.  I'm glad I did because the pink turned out very true to the color sample I picked.  I used Valspar, "Barely Pink".  I didn't want to use something that would look like a stick of bubblegum. When I was working on this project, Lowes had just introduced the HGTV Home by Sherwin Williams collection, so I thought I would give that a go as my Navy color option.  I went with the color "Naval". 

Before
 Blue from before.

 This is the wall my desk used to sit on.

 New to me desk.  This desk gives me much more storage space! 

 My inspirational pillow "follow your heart" from Kirklands.  
I had a 20% off coupon and shipped it to the store, so shipping was free. 

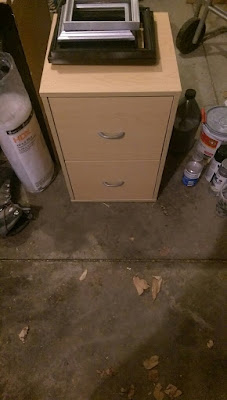
When I changed desks, I lost my file storage.  I picked this one up at Goodwill. 
It was originally marked at $14, but I got it for $7.  They were running a 1/2 off deal if you took the furniture with you at the time of purchase.   
 A couple coats of Zinsser primer and two coats of white spray paint.  
I also painted the handles gold.

 A few photos on the wall!  I picked up all the photo frames while I was at Goodwill.  They ranged from $.99 to $2.99 for the large ones.  I hit them with a coat of spray primer.  Once dry, I used white and gold spray paint. 


For the photos on top of the desk hutch, I used a 12x12 canvas I picked up at Lowes.  I didn't like the pattern on the canvas, but I just painted the edges navy and used a piece of scrapbook paper and some modge podge. The framed "N" was an 8x11 1/2" piece of burlap mounted to a photo frame.   

I picked up the rugs at Target.  They are Threshold brand and were $12.99 for the small one and $24.99 for the larger one.  However, if you keep an eye out on Cartwheel, they will occasionally have a 20% off cartwheel offer.

I spent about $40.00 at At Home on accessories: a gold vase, a bush of pink peonies, a white metal desk organizer, and a new blue cushion for the rocking chair.  I also bought two $1 metal pans from The Dollar Tree and sprayed them with metallic gold spray paint.  I'm using them to hang magnets that I have accumulated for work.

My entire office area has a little more clutter right now than I would like, but it is looking a little more put together.  Total office makeover budget was around $150.  I tried to keep costs down by using things I already had at home.  A lot of things were freshened up with a coat of metallic gold spray paint to fit with my color scheme of white, gold, navy and pink.